S-10 Forum banner

4L60E trans rebuild part DEUX

10K views 57 replies 7 participants last post by  n8rsk8r  
#1 ·
Will start this build with this pic:

Image


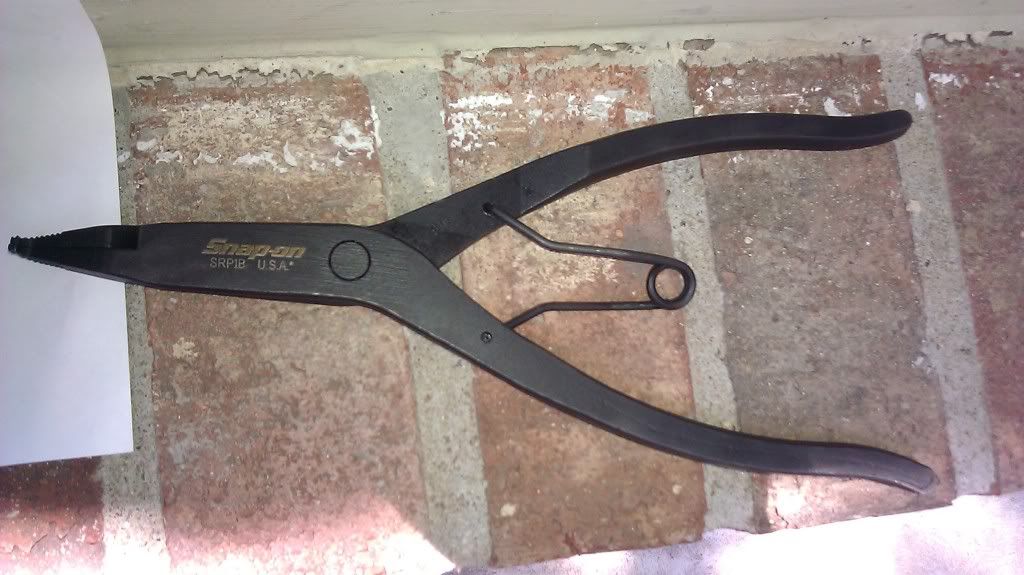
The must have snap ring plier you have to get from Snap-on or one of the other TOOL companies.

I will make sure to make this a sticky worthy thread. Pictures and Videos and all the tid bits of info I can put down on digital..

You should walk away from this thread knowing (without yet doing it) how to rebuild one of these 4L60E transmissions.

This is for a 2.2L 2wd.

I am amassing the part #'s and all the info I need so I can get the parts ordered tomorrow. Told UPS he will be seeing me quite a bit next week :)

I will be using a 2001 4L60E. There was an update to the valvebody in 2001.

Is there anything that you would like to see? Any info or pics you would like me to cover or post up?

Now is the time people :D I am going to start ripping the 2001 apart as soon as I can. I want to get everything cleaned up a bit more, and organized a bit more before I start. I am going to film the whole rebuild so I need to go over the older footage and see what I did and how to redo it for better results..

Wish me luck.. I cannot wait to have the new trans in and working the way the other should have continued to work well into the future. :(

One thing I am doing on this is to install a remote B&M stack plate style cooler w/ fan. I plan on using the Hayden cooler with it also.

Thanks for tuning in.. subscribe because I am telling you it will be worthy :)
 
#28 ·
Okay, buddy in Oregon, a guy who I will start getting my stuff from now, told me today I should have gone with the Superior servos for this build.. says what the other guy said about too much pressure was BS. Not in that way, but that I overpaid for the Sonnax billet servos this time.. and that I should have went with the superior again. Since it is a servo, and easily changed out, I will be able to see if I like them, and can change them at any point in the future should I want to. I get to test out some parts this way me guesses :)

Also, I have to check, was told I have a modified beast shell, when speaking with my buddy said it was not the beast, but I am not sure he knows.. it sure as hell looks like the beast and has the patent number stamped in and all, but with this, the modified beast, there is a collar and a roller bearing in there (torrington) so.. it will help with the parasitic power loss.

Tools should be here tomorrow, they are coming from Missouri. Goal is to have it all wrapped up by sunday night/monday at the latest.

that is coolers added, all the electrical for that and gauges.. then I have a few things to do before I can get the pillar pod and gauges attached. Soon I will be able to see what is going on and shut er' down should an overheat situation happen.

Did receive the badass torque converter today. Whole reason this isn't just a stock rebuild is that a stock rebuild would never last, and as much fun as it is to rebuild these transmissions, it is not fun to constantly be down for repairs.
 
#29 ·
Want to know what is more awesome than "the BEAST shell"?

How about a modified BEAST :D

Image


Yep. Beast w/ collar and Torrington. I will be REBUYING this for the rollerized trans to replace the straight BEAST SHELL that is in there now.
 
#30 ·
Okay got to ripping the 01 apart, I ran into a snag.. the bellhousing bolts were damn near fused with the case. I ended up having to drill 4 heads out, and after the bell housing was removed, I was able to pretty easily take the bolts out. You guys need to watch this. If it happens that the bolts strip out, don't freaking trip. I got you. I have the size of bit and a procedure to get them out.. real easy.

So I am ready to dig into the case.

What I have found out is that the 01' trans I had in was an overheat also. All electrical was "CRISPY" and all the plastic pieces just fell apart. Some bolts were TIGHT and some were not really tight at all. The gasket.. still learning what to look for, the worm holes were all there, a nice fine metal film throughout... the pressure sensor was toast. The plastic that is on the bottom was both cracked/broken.. and no longer "attached" to the underside (the side against the gasket).. I have film of that..

there were 4 spots that showed the checkball damage on the seperator plate. Some wear on it.

I have not cleaned up and checked the individual valve lineups in the valvebody yet.

OH.. the 1/2 accumulator was plastic, but the 3/4 accumulator was metal.. WTF? I have heard that 2001 they started to make em in plastic..

goes to show you there are so many changes between each trans.. you will find out what you need to do, what you want to do.. PINLESS FTW btw.. don't **** with these, replace it with the double seal of the pinless, and you don't have to worry bout the oem "egging" on you and leaking or having the accumulator turning sideways.. the PINLESS are WIDE bodies.. and won't do that... turning sideways.

Oh man. :) I cannot wait to start to get these in quantity. have some on hand. they are fun for sure.
 
#31 ·
Man I guess I pissed some people off here, or everyone has left. I question sometimes making the thought out, and detailed threads I start.. ****ing crickets here and nothing else.

That tool above was a bit too wide, so I had to take a grinder to the back side and ground it down a bit, I guess I got the wrong one, but when I "relieved" the backside... it worked freaking perfectly. I will find out what the right tool is and post a part number so you don't have to grind a $50.00 snap ring tool like I did.

I did get hella hooked up on the frictions and steels. The guy I got them from is an experienced builder, I have been taken away from this build due to a new semester in school, and some other things I care not to get into.

Anyway, I have Borg Warner 3/4 hi energy frictions, kolene steels for a 700r4 and a blend of Raybestos steels and Borg Warner frictions for all else.

Bonded pistons

Transtec gasket/seal kit

Pinless 1/2 2/3 accumulators..

I have a remanufactured 2001 valvebody that has been gone through and Sonnax "fixes" added. It has a 1yr warranty (no questions asked).

Have 29 element dual cage Raybestos sprag, with a new forward sprag.

Modified beast shell with collar and torrington bearing like the "sonnax SMART shell" only it is a beast. With that is the inner race to the forward sprag that has been milled the appropriate amount for the collar and torington bearing.

a BADASS torque converter with an Allison Hub and Flange (think all internals are Allison, shell an s10 w/ custom low/medium stall and torrington bearing seats milled in.. and of course the bearing themselves...) fuqin rockin g.d. TORQUE CONVERTER!!

for the time being this is a stock + rebuild. When money permits, I will be buying the 5 pinions and accompaning parts to make this fully rollerized, (beast shell w/ torrington for the current rollerized I need to rebuild that will hopefully soon replace this one) and any parts I need to make them both identical. I want to be able to swap them out if I need to within a day and not have any down time. I am getting the Torque Converter I have in the current "running" trans warrantied.. but I am throwing that bitch on Ebay and buying another of the same torque converter I just had built.. so I have EXACTLY the same trans as a backup.

What I have found so far is that the frictions were in good shape-ish the edges are frayed like they were overheated, but the actual thickness is ****ing money!!, the reverse drum and 2/4 band was in EXCELLENT shape.. again the friction material looked worn on the edges, but the thickness was spot on for more life :(

I am so g.d. surprised!!! The band is nearly perfect, there is a bit of wear, that is apparent, but the depth is still VERY good. The 4 pinions all felt fine, no wobble what so ever.

The separator plate had 4 check-ball spots that had a bit of mushrooming in the seat. One had a weird wear.. not sure.

Again this unit OVERHEATED.. GET AN EXTERNAL COOLER!!! The electrical was brittle, even for normal pressure to unhook the clips, they all snapped. I found some gasket material inside the case, behind the pump, but not sure if that was from me using he flat screwdriver method of taking the pump out and busting the pump gasket off.. or if it was actually part of the valvebody gasket.. not sure.

I do know is that there was some FUNK build up around the pump/to case and gasket surface. There was metal in the pump filter, there was metal shavings in the screens to the separator plate.

Again, I think the torque converter shelled out, I think that it also overheated A LOT.

I have figured out that there is a difference between HP and HD.

Of course Horse Power will be different than a Heavy Duty unit.. the Heavy Duty unit is more about the amount of abuse from "outside elements" and building it for that.. that would be what I am.. I hate to say I am partially building it for that now, I am building it to do what it needs, and very well, but without the 5 pinions, and torrington upgrades.. it WILL handle what I am going to throw at it, but not as well as if it were built with those.. you know.. but it WILL hold up, I just want to make it more efficient with those upgrades.

I am so tired I am not sure what I am writing. I have pics, but don't honestly feel like posting them up now.. eyes are shutting on me.

I am filming this build 100% and this will be THE coolest fokkin video for these transmissions when I get done. This being a stock +.. I will continue it for a future "upgrade to 65e" status.

I was trying to say earlier.. that guys who tow are finding the Z-pak from Raybestos good, but that setup is not good if you have high horsepower.hat a 8 friction 7 full kolene steel is better.

The tolerances I am going to build this trans for will be TIGHT. I had tolerance of 5 thousands on the 3/4 last time..

I have actually read so much I could g.d. write a book at this point.. lol

I will spare all of you, and I am sure this post is about a page long by now.

i gotta surf some pronz and go to bed

later all.
 
#32 ·
I have learned alot this go round. I have video and pics and all. It will be done when I can get to it. Too damn busy with work.

This build was plauged by wrong parts, the warehouse shorting me parts.. you name it.. what a trip.

I have an account with a trans parts warehouse now and can get awesome prices on parts now. I am actually going to start to build these. I have my first customer, a buddy of mine. I am going to be powdercoating the case for him, and my roller case will get it also. The unit I just rebuilt will get it when I go back through with roller pieces.

Anywho.. I will leave you with a few pics.

Image


Image


Image


Band was good, alot of life left on it :( And because it was good, the reverse drum was also real good..

Image


metal in the screens:
Image


Image
 
#34 ·
Well this one is weird already because of missing parts that should have been sent, me having to go pay for additional stuff.. I can send a link to you for an ebay auction that will do you good. I have seen them on there for a performance build up from say.. $375-$5XX.00 so it is what you want.

You want bonded pistons,
You want a beast shell (the one here is special to a certain builder, it is like the sonnax smart shell, only it is a beast with Torrington bearing, collar, and updated inner race)
You want a good setup for your clutches, mine this time are BW throughout and the high energies for the 3/4 (think 4L65e factory high energy green BW) and Kolenes for the 3/4... new steels for the rest.

When I rebuild my roller unit I will be putting the collar/torrington & modified race on my current beast shell.

You want to get a new reverse drum unless (like you can see my 2/4 band) the band is good and there are NO grooving in it.

New Alto carbonite wide 2/4 wide band.

New electronics of course w/ harness

I opted for a new valvebody with warranty so I know it is good (has all the sonnax updates except the forward pinless accumulator) and you will not be able to add that if you want the warranty to hold up.

I am going with all high performance tolerances (real thin tolerances so engagement is quicker)

I did not change out bushings on this transmission. Plan is to get the other trans rebuilt and back in ASAP (probably christmas) and then take this one back out and do a refresh with all the oem 5 pinions and all.

So I would say by the time you get a torque converter (not sure what one you are wanting, or if you decide to beef it up or what) and the rebuild kit with gaskets and orings, and clutches and steels, and electrical.. could be from $800-$1200. I have seen reman'd valvebodies on ebay for.. I dunno around $200.00 and not sure what all is included or what the deal is with them, what I got was dyno tested for proper function, has all the electrical on it allready -minus TCC and harness, with the sonnax upgrades throughout.. it was $300.00. So that right there was a 1/3 the price.. but again it DID come with 90% of all the electrical.

Hope that helps. I set up a business account with the parts company and my frictions I ended up having to buy were 1/2 the list price. Who knows if they actually sell list price.. but I also have all the tools to do this now, aside from the bushing driver set which I am getting and should be around $100.00 on the looooow loooow hook up.. it will be for this trans only though.
 
#35 ·
I thought I had pics of my 3/4's.. they were half gone, as in the teeth were half gone.

I did have to "massage out" the impacts from the inner teeth on the input sprag (overrun friction side) with a drimmel and sanding/buffing wheel to make sure that those cutches would not bind when they slid up and down. I have a new sprag coming for when I rebuild it or if the roller needs it.

If you want a full rollerized you will need:

Reverse input drum w/ torrington from PATC ($200)
5 pinions front and back ~ ($250.00) from where ever (ebay)
Beast or Sonnax smart shell w/ torrington ($200ish)
4L65e front reaction shaft w/ torrington ($30-$50.00)

those will rollerize (take the thrust washers out and replace w/ thrust bearings) the unit.

And if you go with a rollerized converter like I will from here on out.. that will help as well. I got the low low on it, expect to pay some decent change for it.. say around?? $400.00 for the built converter. Not what I paid, but around that is what one would be sold to you for.. but that is (depending on how much they want to make off you, and this is something I cannot get myself, I have to order it)
 
#38 ·
thanks man. This took waaaaaay too long. the dude who sent me the parts, the missing forwards are STILL not here.

Been feeling like dogshit lately.. think I have caught the flu.. sucks.

Imput drum is put together (over runs, forwards, and 3/4)

Anyone doing a build NEEDS to get lubegard spray assembly lube.. have the trans gel on hand, that is what is needed in areas, but the last build.. jeeze. what a mess w/ that chit.

What is also causing a huge delay is filming and documenting this build. So badass footage so far. I have 7 cameras on it. This is what I do for work, so I just decided to do it for this. Gunna be badass.

Also, from today's posts on, I will need the keys to unlock the above posts and rewrite some of the "writeup" a couple things wrong, like the snap ring pliers are the wrong ones, I had to grind some off the back to get them to work.

Back at it.. Oh and the BCM computer only controls what is inside the cabin, and lights and security and chit.. NOT the trans like some asshat told me.. the PCM or ECM whatever you call it does that. Think PCM is computers?? Feck I don't know nor do I really care at this point. The computer under the hood does the engine and trans.
 
#39 ·
JFC that sonofabitch shorted me my reverse steels.. I want to spit fire and rage...

I can't ****ing catch a ****ing break to save my mother****ing life.

I am going back to the trans shop, have a guy who is going to take me down to the goddamn trans store.. this is going to mean I will have to be up all night taking out and installing the rebuild. I am so pissed, you cannot fathom how pissed I am.. I almost forgot the overrun bonded piston because of it.. I would have found out soon enough.. I have been up pissed off.. trying to calm myself so I can get some sleep. I am going to try my buddy's shop to get them. I am going to have that asshat send me what I purchased.. what he F_UCKED up on.. mother****er

I will never let this happen again.
 
#40 ·
buddy is a life saver, went by his shop (IN TOWN) and just picked up the 5 steels I needed.

I didn't get squat for sleep, taking nap, getting up and finish it. I have awesome footage in the case and all..

Should be pretty straight forward to make the video.. I fugged up in a couple places, forgot the overrun bonded piston.. how I will never know, but rerecorded and have it all good, everything air checks WAY better than it did the first time, but the first build had everything slathered in trans gel.. lol that lubeguard is something else.. awesome awesome awesome stuff.. the seals and rings love it.. seriously. The reshaping tool worked like a charm also, I got that kit off ebay ($200.00) with the resizers, and air check plate.. I don't really see the need in that, but I will do it since I have it (I already air checked the subassemblies.. but it would be nice to know the case is working properly.

Okay I am tired as hell. Nep tyme.
 
#41 ·
I may complete the video on the next rebuild with the bushings, but at least for now, this will have installing:

Pinless Accumulator Pistons in case, and "Pocket"
Istalling an aftermarket servo pin, the grinding and steps to get it done
Normal trans rebuild (checking tolerances with feeler gauges, Air checking assemblies)

So some things I have yet to see, and all in one. I may wait, like I said, till I get the bushing driver set for the next rebuild, go through and take those out.

Anywho, almost done. Looks like I am missing my appointments tomorrow.. no way I am going to get it all buttoned up by then.

Also, for your viewing pleasure I may do a write up on setting up remote coolers. I am going for a total clean install. I am not hacking up the factory (NEW) lines.. no way man..

Later.
 
#42 ·
I may film the rollerized unit getting rebuilt.. but ****. That was a **** ton of work to film this motherfooker..

Some badass footage though. Also.. when doing the case gasket/seperator plate/valve body gasket..

get the plate wet with lube guard and put the gasket on it, it will laminate to the seperator plate, then do the other side.. don't **** with the guide pins and all that BS.. just do that, get it all lined up on both sides and put it on. put in as many bolts as you need to feel comfortable about putting it on, put the hold down plate on and torque it down to 96 in/lbs. then put your valvebody on.

Good good stuff.

Oh and figured out the whole "pin grind" thing.. there is NOTHING online A-BOAT it..

I had to call Sonnax and confirm with them on it. Debating on telling you guys or keeping it my secret :thinking:
 
#43 ·
Oh yeah, trans is done btw. Yes. Finally.

I have the truck in the garage now, about to jack it up and yank the trans out. I did it in 6hrs last time IIRC.. lets see if I can beat that tonight. Caught up on some sleep this morning in anticipation of doing a long day..

alright. Later guys, wish me luck


:crickets: :)
 
#44 ·
the 4l60e in our application is a bit heavier (2.2l) than the engine can somewhat allow.. it isn't the strongest trans by any means... but it has a higher stall converter from factory to help the engine "get on top of it". Gives it just a lil more umph to be able to work the trans.

The torque converter is small, so there is heat build up because of it.

Only 20% of the coolant at any 1 time is diverted to the coolers (not sure if I have said that or not) and so you have to get components that will help you keep the heat down.

Zpak 3/4's clutches are actually not exactly the best for our application. They are designed to run "hotter".. so that actually complicates our standing with our small engines and the small converter.

I am going to be sticking with the Stock High Energy setup (unless I find something better). I wanted so bad to pull the wasted trans apart. Even with the new fluid.. it was chock full of metal shavings. I hope it is only steel and not the pinions and shafts and such. I am going to be changing out the bushings on this next one.. found out there isn't a way to get the bushing drivers any cheaper.. friend though he could, but when his guy got back to him.. he said no dice.

So I will be looking far a set soon.

All for now.
 
#45 ·
Done, took out for a spin. Had a day's worth of trouble getting her to start..

problem? Could not start.. but noticed the gear selector did not show I was in park..

Bad NSS (Neutral Safety Switch).. took care of it and she runs fine now.

shifts are 1.2.3... immediate. no slip, I ground the pin to .86 travel. I think the servo is okay, I like my superior better, and when I rebuild the roller unit, It is getting the NEW Superior Tow Kit.. comes with separator plate that has bonded gaskets on it! ****ING AWESOME! I am ordering that damn soon, just need some money in the bank first.
 
#46 ·
have fiddy miles on dis bitch..

feels real good.

the difference between this and the last are noticeable. I like the stall lower, and also miss the launch of the higher stall :( can't have both, haven't hooked the cooler up yet, but that will be next week..

also the servos being different is something of difference. These are a bit softer than the superior.. they still have kick, just not as hard as the superior's do.

Lovin the new trans :)
 
#47 ·
working on the trailer for the video right now. Gunna be pretty ****ing badass once done. Great footage and all... just getting to putting it together. I hope to have it 100% done in the next couple 2 months. I am adding it to a "season" of an online show I am starting. SO trailer will be out soon, and the video a few months afterward it will air.

I hope to have the trailer done before the end of the week.. we will see :)
 
#48 ·
I have over a Terabyte of film footage for this video. JUST about to launch the trailer for this video.

I will post it here first, then when I actually get the full version done.. I will post links to the WEB-based "show" I developed after being around the "hollywood" crowd filming Extreme Makeover Home Edition when I was invited as a "Pro" for the last official episode 200th episode (Joplin).

Enough with the "Hollywood" aspect.. just real brass tacks on the 4L60-E/4L65-E transmission and how to rebuild yours to last for the "dur" (life of your trans) ation..

:) I iz here to help!!
 
#49 ·
My current trans is STRONG and has no need of change out at this point. I will say that I wish I could have done the bushings for this trans, but at almost $400.00 for the set of bushing drivers.. I can honestly wait till I have those.. which will mean the spare (now) that has the 5 pinions will get the first re-do w/ fresh bushings (that I have but did not install due to "okay" bushings in current trans)..

Time will tell but this trans feels GD strong.. and has the axillary cooler w/ stacked element w/ fan from B&M..

I feel as though this trans will more than last me.. but have the 5-pinion gears screaming to go back in :( damn them!!!
 
#51 ·
Looking forward to seeing the full length video. I picked up a used engine and trans for 300 bucks a few weeks back and getting set to swap that trans into my truck. It is a GM reman unit with 40k on it. Pull mine and rebuild it probably. Keeping the spare engine for parts as needed.

Thanks for putting the time and effort in on this project. A lot of people will surely appreciate it.
 
#52 ·
Hey thanks Polarsusd81

It will be pretty lengthy, and free :) I did spend like 8times longer on the build to get it recorded. I am going to talk to Rob to see if I can get a kit for the extra trans on the cheap to rerecord some bits if need be.

Contact the guy I gave at the end of the video.. he will HOOK YOU UP.. make sure to tell him I sent you.. I am not getting a kick back or anything.. just want him to know I am telling people about him :) Oh and he said they just got in a different friction company and that it is kicking the snot out of even the Borg Warner High energy greens. That is what I used in this build.

I have an issue with the harddrives from Seagate. They all tanked on me last friday. All their partisans went to hell.. so it is data recovery time on a grand scale. I have to bring back ~ 25T of footage.. not going to be fun.

You guys will have to tune into my webshow once I get it going at http://atlashdfilms.com

:)

I will let you guys know just as soon as I can about the video. THERE IS A FREAKING TON of footage to go through and I am still writing the screen play for it.