S-10 Forum banner

2000 boring blazer build

32K views 291 replies 34 participants last post by  tajohns34  
#1 ·

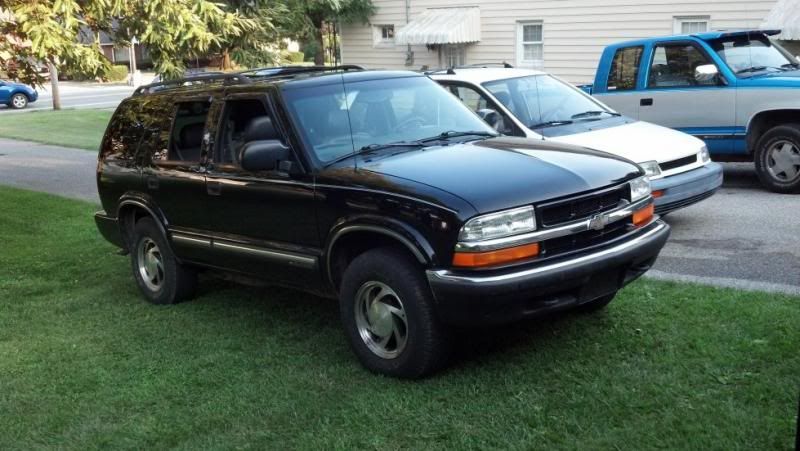
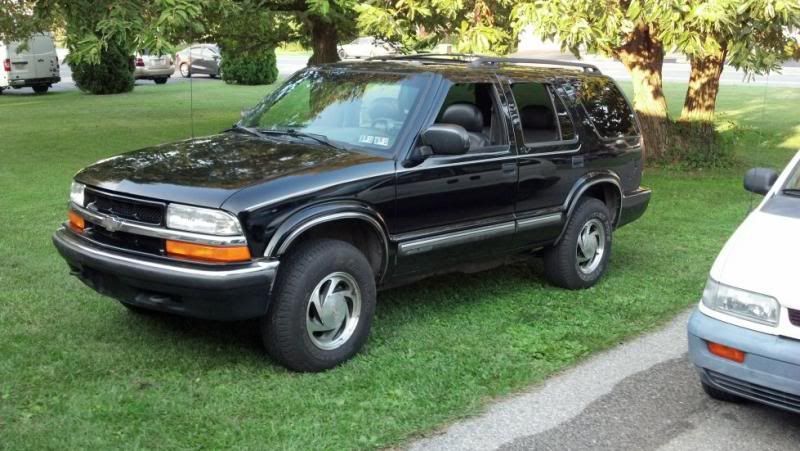
I figured I should finally start a build thread on my 2000 blazer. I am not trying to make a hardcore off road vehicle or anything. I will probably keep it at stock height since my wife drives it sometimes. I will mainly be using it as a daily driver. Other than that I don’t have a real direction that I want to go in. I just work on it when the mood strikes me, or more likely when I actually have time, which isn’t very often. Not with a 17 month old and a wife who works weird hours. Here are some pictures from when I first got it. Just your typical stock blazer.


I actually started this thread last summer on Blazerforum.com. I am just now copying it over here.


#273 ·
Wow, I haven't updated this junk in a while. So last week we had some sub zero temperatures for a few days. Thursday I went to get in the blazer and the doors were frozen shut, but I got the driver's door open. However, when I shut it the latch was back in the closed position and it wouldn't close. Well, this happened.
Image

Image

The striker is pushed back much further than it looks.


Image


I figured while I was at it I would do the hinge pins also. I had my dad help me and just took the door off.
Image


It took forever to get that bottom pin out. The one upper hole was a bit ovaled out so I filled it with JB Weld and let that dry while I worked on the latch debacle.


Image

Image

Image


Here is a better view of the damaged door frame.
Image


Excuse the horrible booger welds. I plan on plating over this eventually but it was getting late and I wanted to get done.
Image


For now I just covered it with some black hammer finish and called it a day.
Image

Image


I wasn't able to get the door spring back in. I need to find the tool, but so far nobody has had one locally. The good news is that the door closes now and the hing works so smoothly. It doesn't sag and creak anymore.
 
#276 ·
About a year or so ago my dynomax strap rusted out so I pulled it off and just left the top part of the hanger on there and didn't worry about it. About 2 weeks I go I noticed that my exhaust was knocking at idle or under acceleration. Well when I crawled under the car this is the first thing I found.
Image


What happened was the front exhaust hanger by the converter had broke so the front pipe was sitting on the cross member. I replaced that, and got a new hanger for the muffler that I had to modify to fit. Luckily I kept that dynomax muffler in storage. I did have the front pipe welded to the flowmaster so I had to cut that off and add a short extension to the back so the pipes would fit. it is all clamped together for now. I forgot how quiet that dynomax muffler was.


Image
Image


I got the old muffler and remains of the strap in the bed of the truck for recycling
Image
Image
 
#277 ·
So, this is something that was scary. I went out with a lady friend on Sunday and I left the blazer out in front of a Sheetz (Sheetz is a large gas station chain here in PA) and she drove after that. It was right in front in plain sight of everyone going in and out so I doubt that it was tampered with. My son was with my parents, so after we were done I left to go pick him up. I drove on the highway for about 15 miles and I started to notice a pretty good noise and vibration.

I got to their house and saw this. (I drove this on the highway!)
Image


Image


I knocked all 5 out and of course the local Advance only had 2 in stock. So I took my truck and drove to one about 20 minutes away. It only took about 5 minutes with an impact to reinstall them. Luckily the wheel was fine. The one stud seemed fine but I figured that it could be fatigued so I figured I would replace that too.

Image
 
#280 ·
I finally got new front shocks.I got Monroe 911514s It makes a massive difference for sure. While i had it apart I cleaned the suspension and frame with Greased lightening, oven cleaner, and brake cleaner and a wire wheel. Then I painted everything black with chassis paint.

Image


Image


Image


Image


Image
 
#281 ·
I had a massive power steering leak so I replaced all of my hoses.even though they are dry. By odd luck I dropped my 10mm behind the grill. So I pulled the grill and there was power steering fluid everywhere. My cooler had a couple of leaky spots so I decided to replace it. I wasn't going to spend $80 for a stock one so I got a little cheap one off of amazon amazon
. Instead of running hoses all the way from the pump I used the lines that went to the stock cooler and just cut and flared the ends. I also sanded all of the surface rust off and primed and painted them. I got it all done an my steering is fine. No more leaks.

This is what is left of the stock cooler. It was leaking where it mounts to the bracket.
Image


Here is what I cut off to run the lines to.
Image

Image


Here is the finished product. I used some pieces of old line to space the 2 pieces apart. Does anyone see what is wrong with this picture?
Image


If you guessed that the lines run right in front of where the grill snaps in you would be right.
 
#283 ·
The cord behind the lines is the ground for my efans. What is poor about the way it is connected? The loop isn't pinched, it is just behind the middle of the core support, it has plenty of room.
 
#285 ·
Yeah, I am not really a fan but it works for now. I have been using those to hold my trans cooler on for years with no issues. I might consider making a bracket eventually to bolt to the stock locations. I might also get bigger cooler but this little one seems to be working okay. I figured this was better than bypassing the cooler all together.
 
#287 ·
Yeah, it was really bad. I never liked the factory style to begin with. There are no cooling fins at all. The rubber lines take up a little more room than I like. When it is warm weather I may run all new nicop lines to the cooler and mount it a little better. This gets me by for now anyway.
 
#288 ·
Mounts work for me. Never had any trouble out of mine either. Good upgrade.
 
#290 ·
I replaced some things this weekend. I replaced the upper control arms with ones I got from the junkyard and painted and Installed new bushings. I also added urethane upper and lower universal bump stops from Energy Suspension. I also did, all 4 ball joints, torsion bar mounts and pads and rotors. I got it aligned yesterday and it is so much better now. My stock control arm bushings were really bad, as in chunks were missing. I also replaced one of the cam bolts on each side. I thought they were sets of 2 but they were individual. Luckily my factory ones were in good shape. Here are some pictures

Image

Image

Image

Image

Image

Image

Image


Now I just need to figure out why my ABS light is on. I double checked that all of the sensors are plugged in. The only thing I can see is that the brake fluid reservoir was over full, I guess from compressing the caliper pistons.
 
#291 ·
Found the ABS light culprit. The driver's side sensor wasn't all the way into the hub. I replaced the whole thing anyway since it was in pretty sketchy shape and I had a new one on hand. No more ABS light.
 
#292 ·
Wow, I really stink at keeping this build up to date. I finally had to make a decision on the blazer. It has gotten to the point where the rust has gotten to be more than I can handle. The frame is swiss cheese and the body mounts on the frame and body are pretty much gone.

Image